

I discovered a Yoto mini player a few months back, (thanks to Pinterest!) and it couldn’t have come at a better time for us because I was looking for something that could play music at bed time for our twin toddlers.
If you have a Yoto player in your house, you already know how magical it is. Kids can listen to stories, music, and activities without screens! and honestly, that alone makes it worth it. The Yoto player has a simple design with easy tactile controls for little ones. Our two year olds immediately knew how to put in a card and play audio on their Yoto.
Making your own Yoto cards is so simple! You can make your own Yoto cards at home, customize them however you want, and choose from endless stories and music options. In this blog post we are going to go over how to make your own cards and custom labels.
What You’ll Need to Make Your Own Yoto Cards
Supplies:
- Yoto mini (obviously)
- MYO Yoto cards
- A Yoto account + the Yoto app
- Audio files (MP3, M4A, etc.)
- A printer
- Vinyl sticker paper
- Self-adhesive laminating paper
- Scissors or rotary cutter and cutting mat
That’s it! No special equipment.
Step 1: Purchase Audio (MP3 Files)
I found my childhood favorite audio adventures, Patch the Pirate and bought some of my favorite adventures for our kids. After purchasing, download the audio files to your computer.
Step 2: Upload Audio to Yoto
Go to Yoto’s website and scroll down to the bottom of the page. Under “Services” click “make your own”. From their, click on visit library/make playlist. Now you can add cover artwork, upload audio files and select icons for each track.
Step 3: Create a Custom Yoto Card Template
This is where you can really personalize things and make your cards look just as nice (or nicer) than the official ones.
To design your own card, you can use
- Canva
- Adobe Design
Where to Find Yoto Card Label Templates:
On a Yoto forum I found https://yotolabels.com/ that makes it so simple to upload artwork and print out card labels!
Step 4: Print and Cut Your Labels
Once your template is done, print it on vinyl sticker paper. If you want them to last longer, you can laminate the labels. Carefully cut them out and stick them onto the cards. Try to center the label so it doesn’t peel at the edges.
Step 5: Link the Audio to Your Card
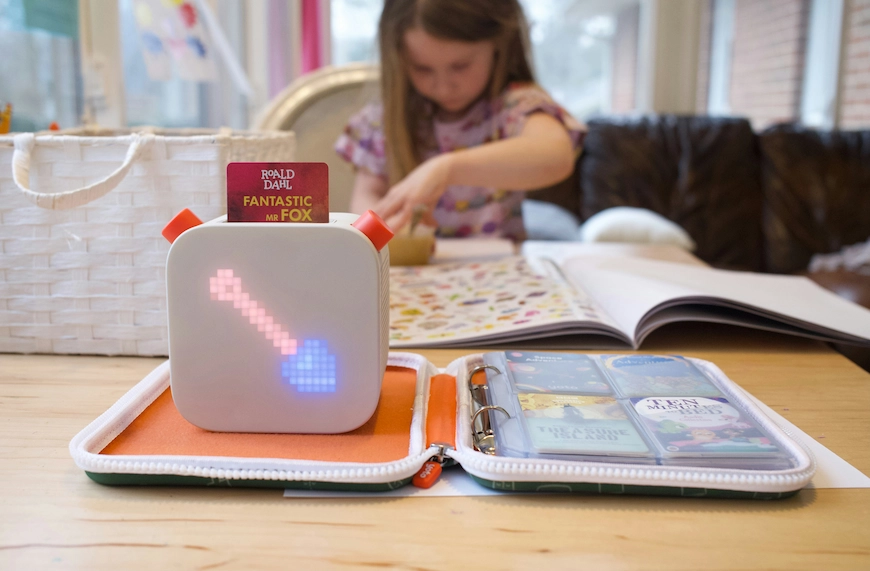
In the Yoto app, click the playlist you just created. Tap “Link a card” and hold your blank MYO card to your phone when prompted. And like magic, that’s it! The card is now programmed.
Step 6: Organize Your Cards
This step is optional, but trust me, organization makes life easier.
Amazon has lots of card case options for the Yoto player. I bought this one because it can hold up to 88 cards! I also love that it displays four cards per page. I also appreciate the card slot design- it makes it extremely easy to take out the cards.
Check out my video on YouTube (don’t forget to like and subscribe!)
.webp)