

Decorating sugar cookies with royal icing can feel both exciting and intimidating—especially when you’re just getting started. I remember staring at beautifully decorated cookies and wondering how in the world bakers made their icing look so smooth, glossy, and perfectly detailed. Back then, I was just using powdered sugar and water to make my icing. The secret isn’t fancy tools or complicated techniques. It all comes down to understanding icing consistency.
If you can master the three main icing consistencies—flood, medium, and thick, you’ll instantly gain more confidence and control in your decorating. Each consistency has a specific purpose, and knowing when (and how) to use them makes the entire process smoother and far less frustrating. Once you understand how icing should flow, settle, and hold its shape, decorating becomes so much more enjoyable.
Of course, even experienced bakers run into problems. Uneven drying, air bubbles, craters, color bleeding, and ripples happen to all of us. The good news? Most decorating mistakes are completely fixable. With a few simple adjustments and practical tips, you can avoid common issues and troubleshoot them when they pop up.
In this post, I’m breaking down the three main icing consistencies and sharing helpful solutions to the most common sugar cookie decorating problems—so you can decorate with confidence and have fun doing it.
.png)
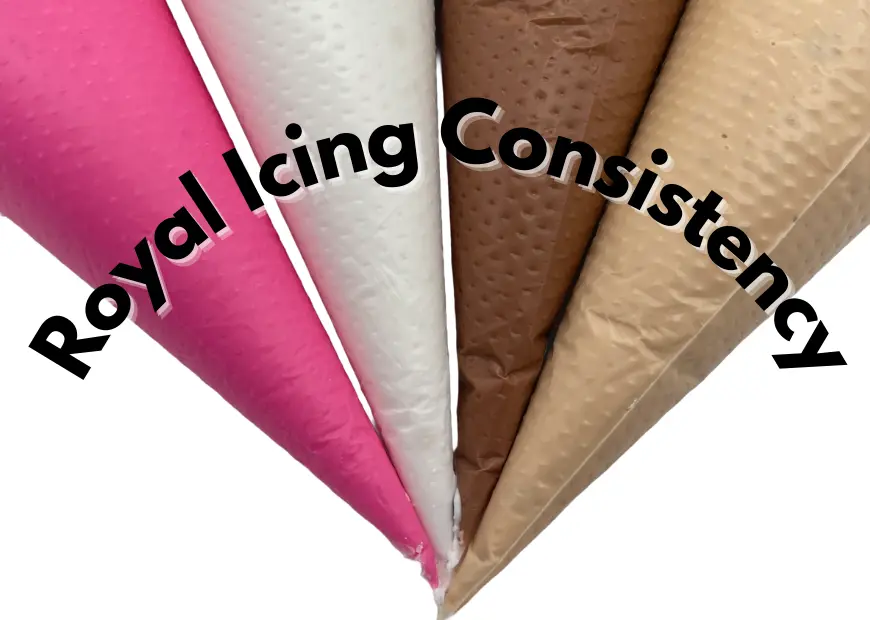
The Three Main Icing Consistencies
Flood
Flood consistency icing is used for covering the surface of a cookie. Flood icing settles into itself and doesn’t need much manipulation from a scribe tool.
Medium
Medium consistency icing is used for outlining the perimeter of a cookie before flooding. Medium icing needs some manipulation from the scribe tool to fully settle.
Thick (aka piping)
Thick consistency is used for decorations that need to hold their shape, like flowers for example.
Common Problems When Decorating Sugar Cookies
Mistakes are inevitable, and every baker runs into them while decorating. If I ice a cookie and the surface dries unevenly, or I’m piping letters and one goes wonky, I just scrape off the icing with a knife and start over.
If most of the cookie looks great and only a small flaw remains, try to repurpose it. Sometimes I accidentally bump cookies while they’re still wet, leaving a ripple or uneven spot. Thankfully, most designs give you room to add a detail or layer that hides it completely.
Shaky hands while decorating can also happen if the icing is too thick and hard to squeeze. A helpful tip: before filling your icing bag, test the consistency to make sure it will flow smoothly and be workable for your design.
Bubbles
Air bubbles can get trapped in the icing and dry right onto your cookies. To avoid this, don’t overmix or stir the icing too vigorously which can introduce extra air. A helpful trick is to prepare your icing a day in advance; letting it rest gives the bubbles time to rise to the surface so you can gently stir them out before decorating.
Craters
Larger, flat areas of icing usually dry evenly, but smaller sections—like a pumpkin stem—can develop tiny craters. This happens when air gets trapped under the surface and then deflates as the icing dries. To prevent this, pipe a few thin, even lines of icing in the small area first and let them set. Then go back and flood the rest. This gives the icing structure and helps stop those pesky craters from forming.
Bleeding colors
Be careful when working with high-contrast colors like black and white or red and blue. If you’re layering one contrasting color on top of another, let the base layer dry completely first. Sometimes bleeding is unavoidable—like adding white stars onto the blue field of an American flag cookie. In those cases, try making your icing slightly stiffer so there’s less moisture that can seep into the other colors.
Ripples
Avoid overfilling with icing, as too much can cause rippling. The top layer dries faster than the bottom, and when there’s excess icing, the uneven drying creates waves or ripples across the surface.
Non-Smooth Surface
To prevent bubbles and texture issues, avoid over-mixing or aggressively stirring your royal icing—this introduces air and disrupts the surface. You also want the icing consistency just right: thin enough to settle smoothly on its own, but not so thin that it runs over the edges.
For my royal icing recipe, click here.